
Brake Line Inspection: Frequency, Triggers, and Proactive Scheduling
Visual and pressure-test protocols for detecting brake line leaks
Regular visual checks are important for spotting problems early on. Use good lighting when inspecting surfaces for signs of corrosion, any fluid leaks, or areas that look swollen along the exposed lines. Pay special attention to those critical points like fittings, calipers, and ABS modules since most issues start there according to industry data showing around three quarters of all failures come from these locations. When doing the inspection, watch out for damp patches, that telltale greenish color from copper-nickel oxidation, or coatings that have started to bubble off. For a more thorough check, run a pressure test too. Attach a gauge to the master cylinder, pump it up to about 1500 pounds per square inch, then wait a full minute. If the pressure drops by more than 10 percent during that time, it's probably time to address what looks like a leak before things get worse.
Recommended inspection frequency: Mileage, age, and environmental factors
Base inspection intervals on three interdependent variables:
- Mileage: At minimum, inspect annually or every 15,000 miles
- Age: Begin quarterly inspections after 5 years of service
-
Environment: In coastal or snowbelt regions, inspect bimonthly due to salt-induced corrosion acceleration
Vehicles operating in high-humidity or off-road conditions warrant 50% shorter intervals. Document each inspection to identify progressive degradation patterns over time.
Key failure indicators: Rust, kinks, spongy pedal, and hidden damage patterns
Prioritize these red flags during inspections:
- Surface rust: Flaking or bubbling under protective coatings indicates advanced corrosion
- Kinks: Sharp bends exceeding 30° restrict flow and create stress fractures
- Spongy pedal feel: Often reflects air intrusion from micro-leaks
- Hidden damage: Peel back protective sheathing to check for pinhole leaks or electrolytic corrosion between dissimilar metals; internal degradation may appear first as dark streaks near fittings before external signs emerge.
Corrosion Prevention and Underbody Protection Strategies
Best practices for salt and moisture mitigation: Rinsing, coatings, and climate-specific care
The main culprits behind brake line rust? Salt and dampness, hands down. If living somewhere cold where roads get treated with de-icing salts, give the car's underside a good wash once a week using just regular garden hose pressure to knock off all that accumulated road salt. For protection against rust, coat those areas prone to corrosion with products like zinc primer or rubber based sealant stuff, especially around spots where different parts connect. Cars near the ocean need checking every three months because sea air carries lots of salt particles. Desert dwellers can usually wait until once per year for another layer of protection. The National Highway Traffic Safety Administration found back in 2020 that cars left unprotected in places with high corrosion rates see their brake lines wear out at about triple the normal rate.
Maintaining clip integrity and proper routing to prevent vibration-induced fatigue
Make sure those factory mounting clips are still there and holding tight. If any look damaged or loose, swap them out right away because otherwise we're talking about unwanted movement problems down the road. When checking brake lines, they need to stay at least quarter inch away from anything that moves around. Stick with how they were originally routed too. Lines that aren't properly secured will start vibrating like crazy over time. This vibration wears down metal at stress points and can actually create tiny cracks that nobody wants to deal with later. While working on these systems, never bend brake lines close to their fittings. Always grab the right flaring tools for the job. Doing it wrong creates weak spots where rust tends to take hold first. Trust me, saving a few bucks on tools now prevents major headaches later when those weak points give way unexpectedly.
Brake Line Material Selection and Real-World Durability
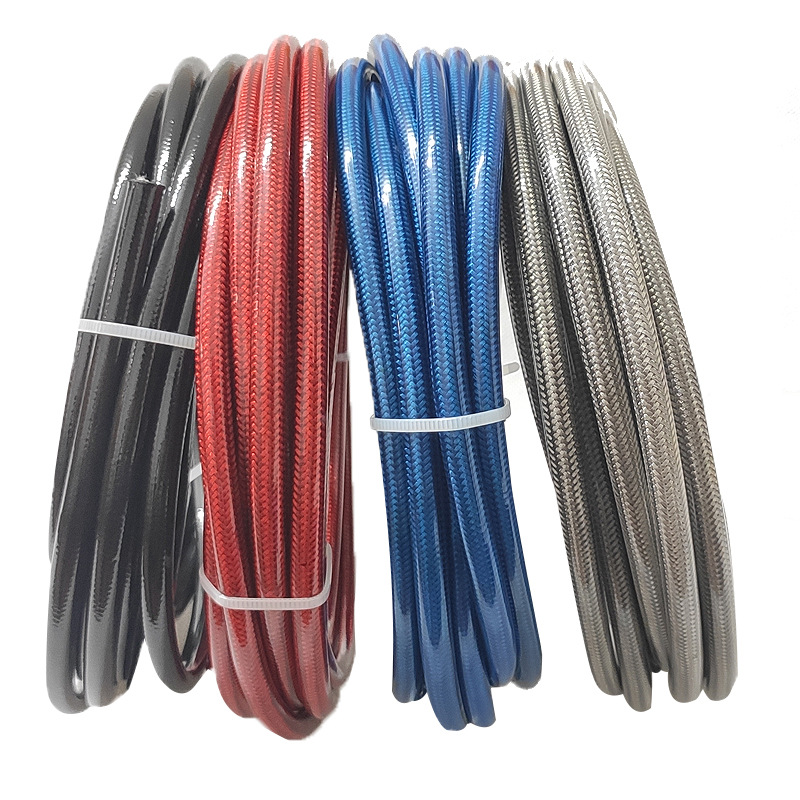
Comparing brake line materials: Steel, PVF-coated, copper-nickel, and stainless steel
What materials we pick really matters when it comes to how long something lasts and whether it stays safe over time. Plain old steel can handle a lot of pressure but needs some kind of protection against rusting out. PVF coated steel holds up better against corrosion in average weather conditions, although those coatings tend to chip away when stones hit them or when there's regular wear and tear from handling. Copper nickel mixtures offer pretty good protection from rust while also bending without breaking as easily, which means fewer problems with kinks forming during setup work. Stainless steel stands out because it just plain lasts longer and doesn't rust on its own, making it great for places where things get rough, even though people usually pay more upfront for this option. Every material listed here works fine under standard hydraulic pressures above 15,000 psi, but they vary quite a bit in terms of how well they stand up to corrosion and how easy they are to maintain once installed.
Service life analysis: NHTSA 2018–2023 data on stainless vs. coated steel in corrosive environments
According to NHTSA research spanning several years in both coastal areas and regions with lots of winter road conditions, stainless steel brake lines last around 15 years on average. That's almost twice as long as the typical 8 year lifespan seen with PVF coated steel. Looking at what happens after ten years shows an even bigger difference. About 92% of stainless steel parts still held up structurally while only about half (45%) of the coated steel maintained their integrity. Things get really interesting when there's a lot of road salt involved. The coatings tend to crack at microscopic levels, letting water seep in and causing those annoying pits to form in the material. Stainless steel doesn't have this problem because it has a consistent makeup throughout, making it much more resistant to these kinds of failures.
Brake Fluid Maintenance and Its Impact on Brake Line Longevity
Flush intervals and contamination risks: How moisture in DOT 3/4/5.1 fluid degrades brake lines
Brake fluids based on glycol (like DOT 3, 4, and 5.1 types) tend to soak up moisture from the air at around 3% annually. Over time, this moisture turns the fluid into something that eats away at metal brake lines from within. The effect? Boiling points drop by more than 100 degrees Fahrenheit according to those SAE standards we all hear about, which makes vapor lock problems much more likely. Mechanics generally recommend changing out the brake fluid roughly every two years or after driving about 30 thousand miles. This helps get rid of that waterlogged fluid before it starts damaging the inner walls of the lines or causing rubber parts to swell up. When people put off this basic maintenance, they're setting themselves up for trouble. The metal inside gets pitted, hoses break down faster, and eventually there's a real chance of complete hydraulic system failure during operation.
Link between brake fluid hygroscopicity and internal line corrosion or swelling
Glycol based fluids have a tendency to absorb moisture from the air, which sets off chemical reactions inside brake line systems. When water gets mixed in with these fluids, it starts reacting with metal parts like iron and copper components within the system. Over time, this creates acidic substances that eat away at metal surfaces, typically reducing wall thickness somewhere around 0.1 millimeters each year. The worst damage tends to happen right at those weld joints in stainless steel tubing and wherever there are flaws or gaps in protective coatings on other types of steel. Another problem comes when rubber brake hoses get swollen because they've absorbed too much moisture. This swelling can boost internal pressure levels by as much as 15 percent, putting extra strain on all those critical connection points throughout the braking system.
| Fluid Type | Dry Boiling Point | Wet Boiling Point | Hygroscopicity |
|---|---|---|---|
| DOT 3 | 401°F (205°C) | 284°F (140°C) | High |
| DOT 4 | 446°F (230°C) | 311°F (155°C) | High |
| DOT 5.1 | 500°F (260°C) | 356°F (180°C) | Moderate-High |
Regular fluid replacement preserves internal diameter and ensures consistent hydraulic pressure transmission. Vehicles in humid climates should follow more frequent service schedules to offset accelerated moisture absorption.
Avoiding Common Maintenance Mistakes That Damage Brake Lines
Risks of over-torquing, improper flaring, and using incompatible aftermarket hoses
When someone overtightens fittings, it can actually crack the threads or mess up those important sealing surfaces, leading to annoying leaks down the road. That's why having a good quality torque wrench calibrated properly makes all the difference in the world. Flares done wrong create weak spots that will burst when pressure builds up during normal driving conditions. Make sure those double flare tools are exactly the right size for whatever line diameter we're working with here. Aftermarket hoses that don't meet specifications tend to give out pretty quickly since they simply aren't built to handle the harsh chemical properties of brake fluid or those unexpected pressure surges. Always go with parts that match original equipment manufacturer specs. Some recent independent tests found that around three quarters of early hose failures come from using inferior materials. Don't wait until it's too late - replace any old or damaged hoses immediately if there's even a hint of potential brake failure looming ahead.
Critical junction points: Ensuring ferrule, banjo bolt, and hose-to-line connection integrity
The ferrules need to compress the brake line evenly rather than crushing it if we want that dependable seal. Always check for signs of corrosion whenever there's a fluid change going on. When dealing with banjo bolts, fresh copper washers are essential plus getting the torque right matters a lot too. Most folks torque them between 16 and 22 foot pounds which helps keep leaks at bay. Hose connections tend to go bad mostly because they get loose from all that vibration or rub against things when routed incorrectly. Make sure all those clips are properly secured and leave about a quarter inch space away from anything that moves around. Checking those junction points every 15 thousand miles makes sense since regular inspections pick up roughly 89 percent of problems long before something serious happens. And remember to tackle any corrosion spots as soon as possible especially where stress tends to concentrate.
FAQ
How often should brake lines be inspected?
Brake lines should be inspected annually or every 15,000 miles. However, if the vehicle is older than five years, quarterly inspections are recommended. In coastal or snowbelt regions, bimonthly inspections are advised due to increased risk of corrosion.
What are the major signs that a brake line needs attention?
Signs include surface rust, kinks, a spongy pedal feel, and hidden damage like pinhole leaks or corrosion under protective sheathing.
Why is it important to change brake fluid regularly?
Regular brake fluid changes prevent the buildup of moisture, which can degrade brake lines from within and lower boiling points, increasing the risk of vapor lock and other issues.
How can corrosion of brake lines be prevented?
Corrosion can be minimized through regular rinses to remove salt, applying protective coatings, and ensuring proper routing of brake lines to prevent vibration-induced fatigue.
Table of Contents
- Brake Line Inspection: Frequency, Triggers, and Proactive Scheduling
- Corrosion Prevention and Underbody Protection Strategies
- Brake Line Material Selection and Real-World Durability
- Brake Fluid Maintenance and Its Impact on Brake Line Longevity
- Avoiding Common Maintenance Mistakes That Damage Brake Lines
- FAQ